Embarking on a DIY electronics project can be an incredibly rewarding experience, blending creativity, problem-solving, and technical skills. Whether you’re a seasoned hobbyist or a curious beginner, here’s a step-by-step guide to help you navigate your first electronics project from concept to completion.
Step 1: Choose Your Project
1.1. Identify Your Interest Start by determining what excites you about electronics. Are you interested in creating a simple LED circuit, a more complex Arduino-based project, or perhaps a wearable electronic device?
1.2. Assess Your Skill Level Select a project that matches your current skill level. Beginners might start with something straightforward like a blinking LED or a basic sound sensor, while more advanced enthusiasts might tackle home automation or robotics.
1.3. Research Project Ideas Use resources like Instructables, Make: Magazine, and YouTube tutorials to find detailed guides and inspiration. Ensure the project has clear instructions and a list of required components.
Step 2: Gather Materials and Tools
2.1. Create a Component List Once you’ve chosen your project, list all the components you’ll need, such as resistors, capacitors, LEDs, microcontrollers, sensors, and other electronic parts.
2.2. Source Your Components Purchase your components from reliable suppliers like Adafruit, SparkFun, or local electronics stores. You might also find kits that include all necessary parts.
2.3. Essential Tools Ensure you have the following tools:
- Soldering iron and solder
- Breadboard and jumper wires
- Multimeter
- Wire cutters and strippers
- Screwdrivers and pliers
- Safety equipment (e.g., goggles)
Step 3: Learn the Basics
3.1. Understand Circuit Diagrams Familiarize yourself with reading circuit diagrams and schematics. These diagrams are blueprints for your project and will guide you in assembling your circuit correctly.
3.2. Basic Electronics Principles Learn fundamental concepts such as Ohm’s Law, voltage, current, and resistance. Websites like Khan Academy and Coursera offer free courses on basic electronics.
3.3. Practice Soldering If your project involves soldering, practice on a scrap piece of PCB (printed circuit board) to get comfortable with the technique.
Step 4: Build the Prototype
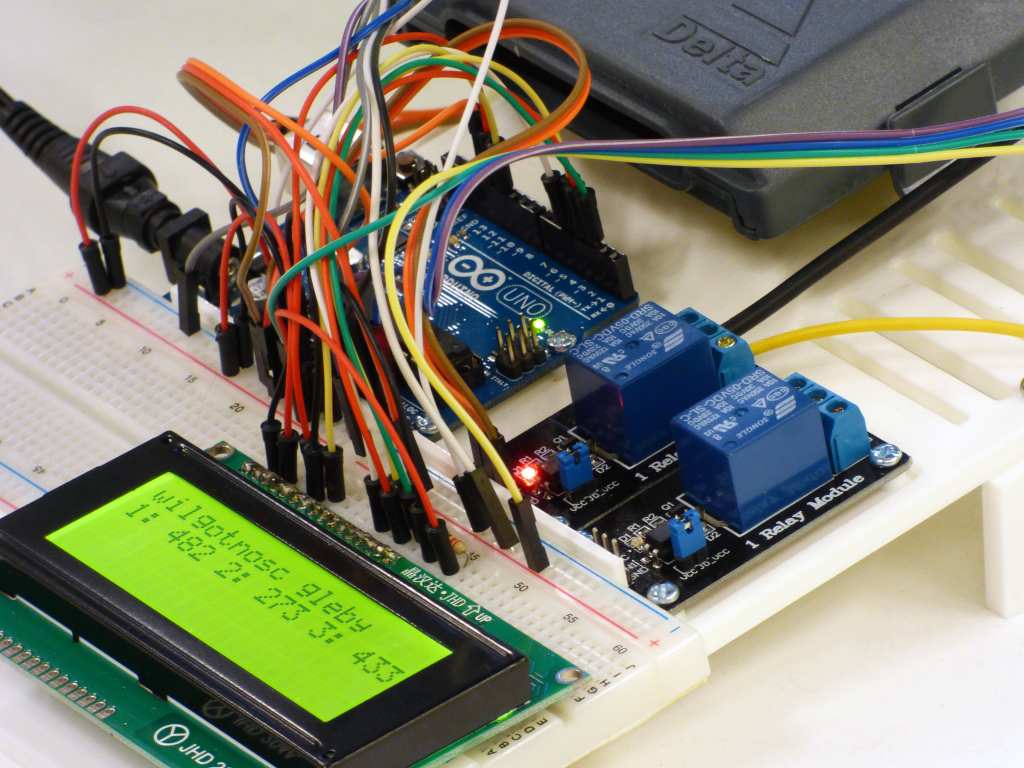
4.1. Breadboarding Before soldering, build your circuit on a breadboard. This allows you to test and troubleshoot without permanent connections. Follow the schematic and place components carefully.
4.2. Testing and Troubleshooting Use a multimeter to check connections and ensure there are no short circuits. Verify each part of the circuit functions as expected. If something doesn’t work, double-check connections and component orientation.
Step 5: Final Assembly
5.1. Soldering the Circuit Once your prototype works on the breadboard, transfer it to a PCB. Solder each component, being careful to avoid overheating and ensuring solid connections.
5.2. Enclosure and Finishing Touches Design and assemble an enclosure for your project to protect the components. This could be a custom 3D-printed case or a repurposed box.
5.3. Power Supply Choose an appropriate power supply (battery or adapter) for your project. Ensure it meets the voltage and current requirements of your circuit.
Step 6: Documentation and Sharing
6.1. Document Your Process Keep a record of your steps, challenges, and solutions. This can be helpful for future projects and for sharing with the DIY community.
6.2. Share Your Project Post your project online on platforms like Instructables, GitHub, or social media. Sharing your work not only helps others but also connects you with a community of like-minded enthusiasts.
Step 7: Iteration and Improvement
7.1. Reflect on Your Project Analyze what worked well and what didn’t. Note any improvements you can make in future projects.
7.2. Expand Your Skills Based on your experience, take on more complex projects. Learn new techniques, such as coding for microcontrollers, designing custom PCBs, or integrating wireless communication.
Conclusion
DIY electronics projects are a fantastic way to blend creativity with technology. By following these steps, you can transform your ideas into functional, tangible creations. Remember, every project is a learning opportunity, so embrace the challenges and enjoy the process. Happy building!


Leave a comment